About local environment
When you build local environment, how do you build it? XAMPP? You should stop it right now. On MacOS, you install required middlewares directly? You should stop it right now too. Local environment should be:- as same environment as production as possible,
- able to remove & recover anytime,
- able to share it with project members.
PuPHPet can realize these conditions very easily.
Preconditions
In order to use PuPHPet, you need to install Vagrant (1.8.x in May/2016) and VirtualBox (v5 in May/2016). You can install both easily from official site.You can check current version of Vagrant with this command.
$ vagrant --versionIf this is older than required version, you can download the package from the official site and install again.
How to use PuPHPet
It's quite easy because all you have to do is to follow GUI.Here's the example to build PHP/Apache/MySQL environment.
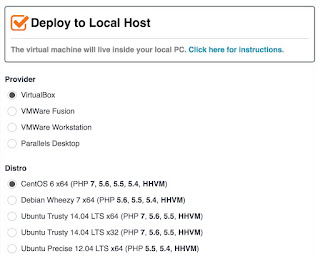
Deploy target
Basically you can choose VirtualBox. Then you can choose favorite OS.
You can follow default values but I recommend to specify over 1024 on Memory.
You can specify the directory to deploy source code on LOCAL PC.
Modification of source code on this directory is synchronized on guest OS.
If your local PC is MacOS, this tool recommends to choose NFS.
System Packages
You'd better choose vim.
Web servers
In this example, we choose not NginX but Apache.
So I checked Install Apache.
You can choose favorite Server Name but this domain name can be used when you access to this site on browser.
Languages
Basically we can follow default values.
This is default setting but we should check Install Composer.
Databases
On this setting, we can specify password of root user.
Also we can create a database on this screen.
Create Archive
When you finish all settings, just download!
Boot a virtual server on local and access on browswer
After you download it, you can unzip it.On the directory that you unzipped it, you can boot a virtual server like this.
$ vagrant up
Then you can log in to it.
$ vagrant ssh
Please notice Apache is NOT started by default.
$ sudo service httpd start
Then you can access to it on browswer.
http://192.168.56.101/
If you can confirm this screen, configuration of Vagrant is successful.
Please do not forget to set hosts file (/etc/hosts on MacOS). You can add this config.
192.168.56.101 awesome.dev #You need to specify the domain name you registered.Then you can access to http://awesome.dev/
Contents on DocumentRoot is displayed.
Trouble Shooting
When I chose to install NginX, finally I couldn't set configs successfully. PHP file is downloaded when I access to it on browser.If you have any solutions, please share with me!


0 Comments:
Post a Comment